Lately at Launchpresso, a client asked a very interesting question:How can we continue to advertise our products when we run out of stock?
Initially, I thought it was a simple solution; just increase the inventory levels in Shopify.
However, my client pointed out that this would mess up their inventory system.
After investigating further, I found that there is a way to continue advertising products that are out of stock. But it requires a few setting adjustments in the back of your Shopify store and the Google Merchant Center. In this post, let’s look at how to do that.
Step 1: Adjust Shopify Inventory Settings
To start, you need to adjust the inventory settings in your Shopify store. Here’s how:
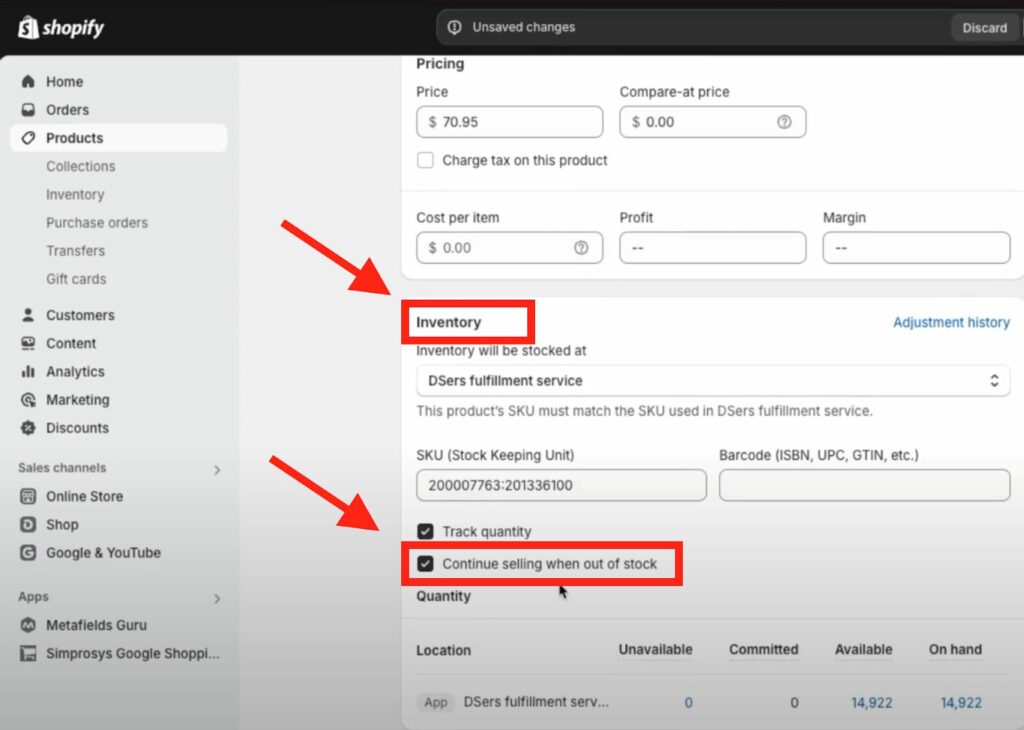
1. Go to the “Products” section in your Shopify store and click on the product you want to adjust.
2. Scroll down to the “Inventory” section and check the box that says “Continue selling when out of stock”.
3. Click “Save” to apply the changes.
If you want to apply this setting to multiple products at once, you can use the bulk edit feature:
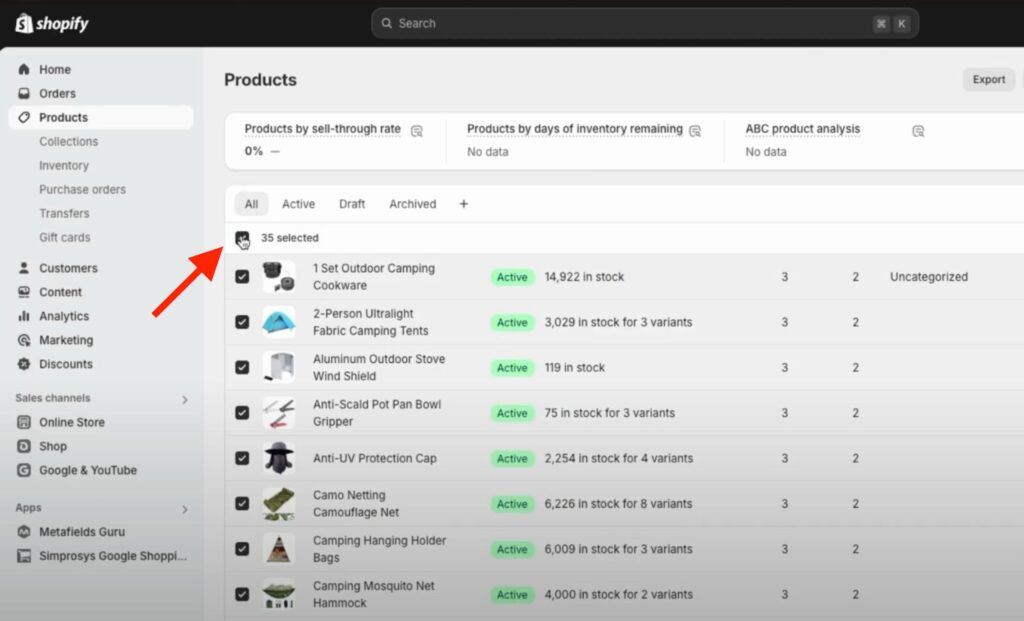
1. Go to the “Products” section and select all the products you want to adjust.
2. Click “Bulk edits”.
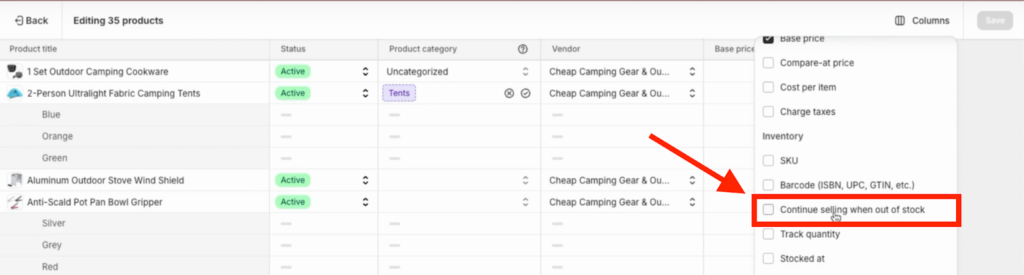
3. You’ll be directed to the bulk edits screen. Over here, you need to find “Columns” on the top right-hand side of the screen. Click on this and scroll down until you find “Continue selling when out of stock”. Check the box.
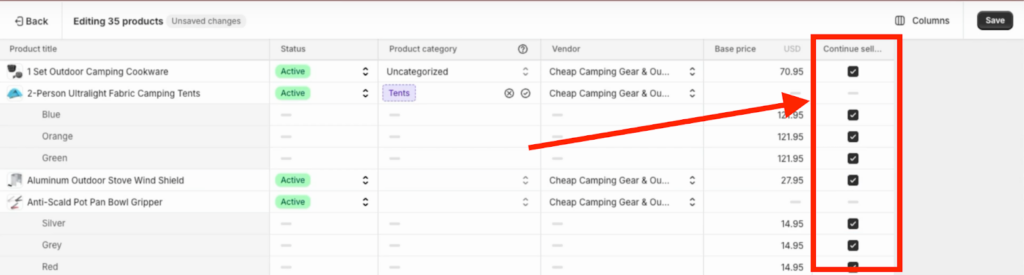
4. You’ll need to check the boxes in the last column for the relevant products, then click “Save” to apply the changes
Find more details in the complete tutorial:
Step 2: Set Up Feed Rules in Google Merchant Center
Next, you need to set up the feed rules in the Google Merchant Center. This will ensure that your products don’t become disapproved when they’re out of stock. Here’s how:
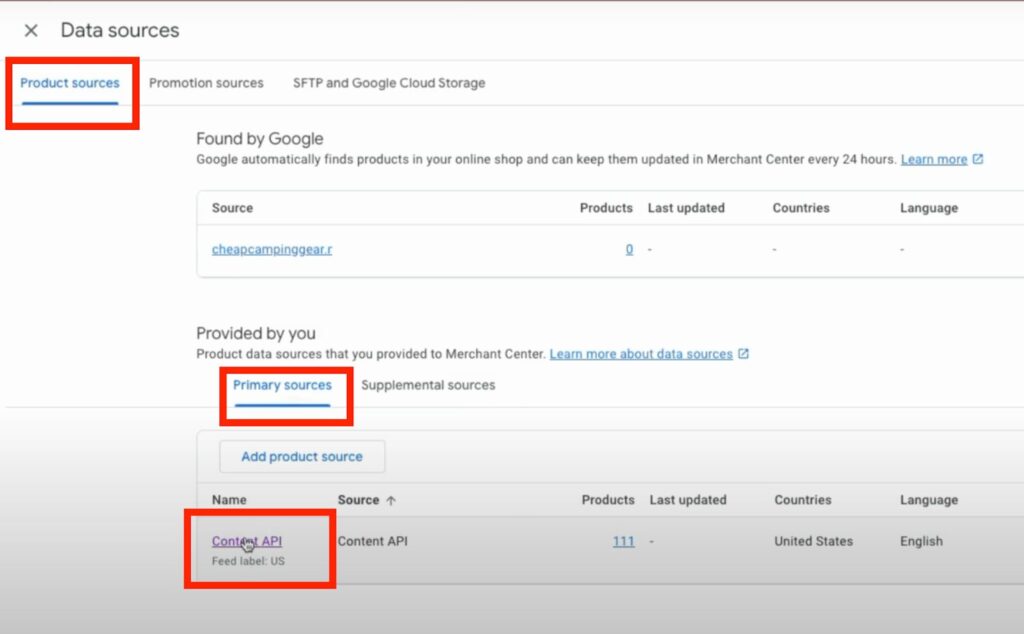
1. Go to the Google Merchant Center and navigate to the “Data sources” section. You can find it as shown in the image below ot follow this path: Products > View data sources.
2. Go to “Product Sources” and then click on your primary data source. In this case, it’s “Content API”.
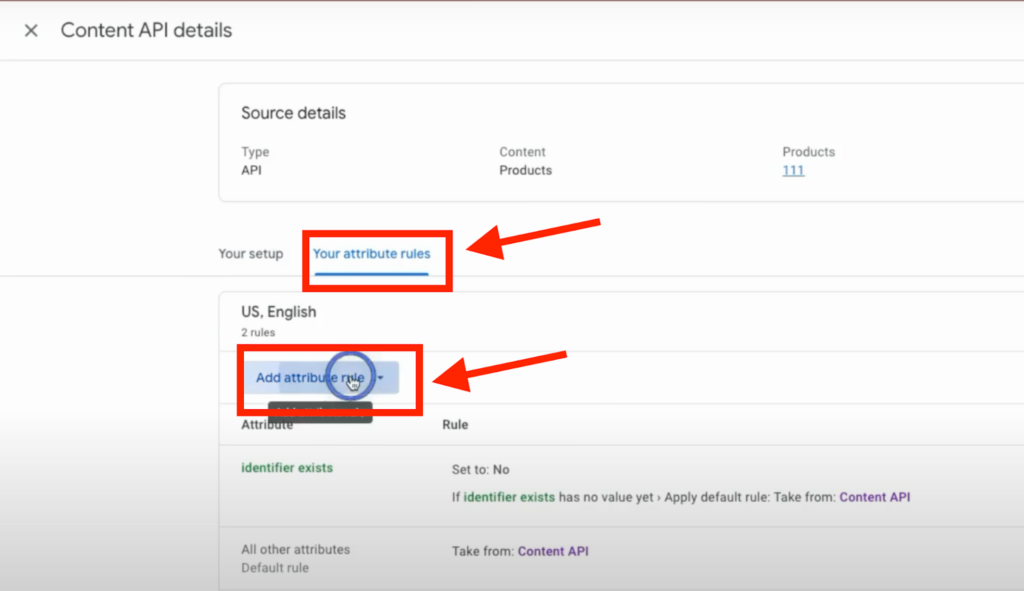
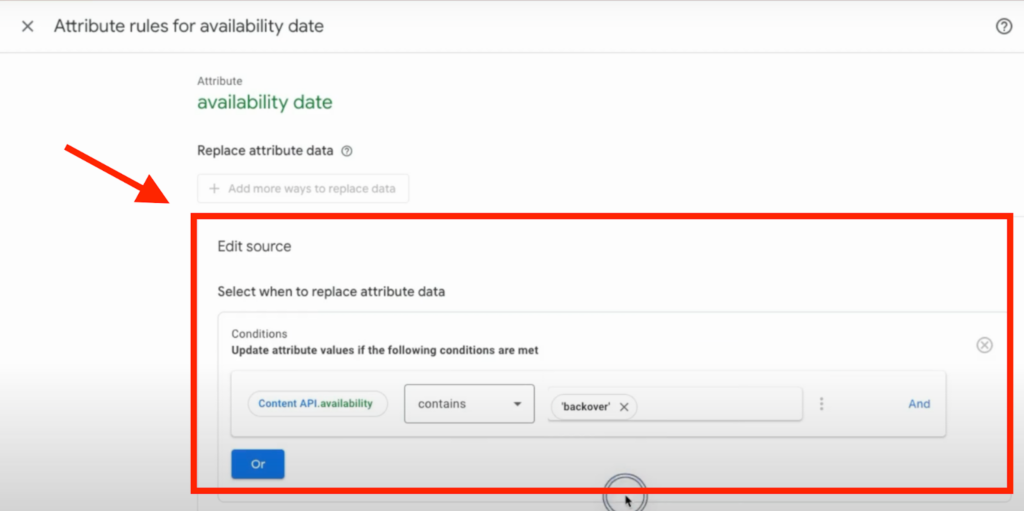
3. Click on the “Attribute rules” tab and add a new rule.
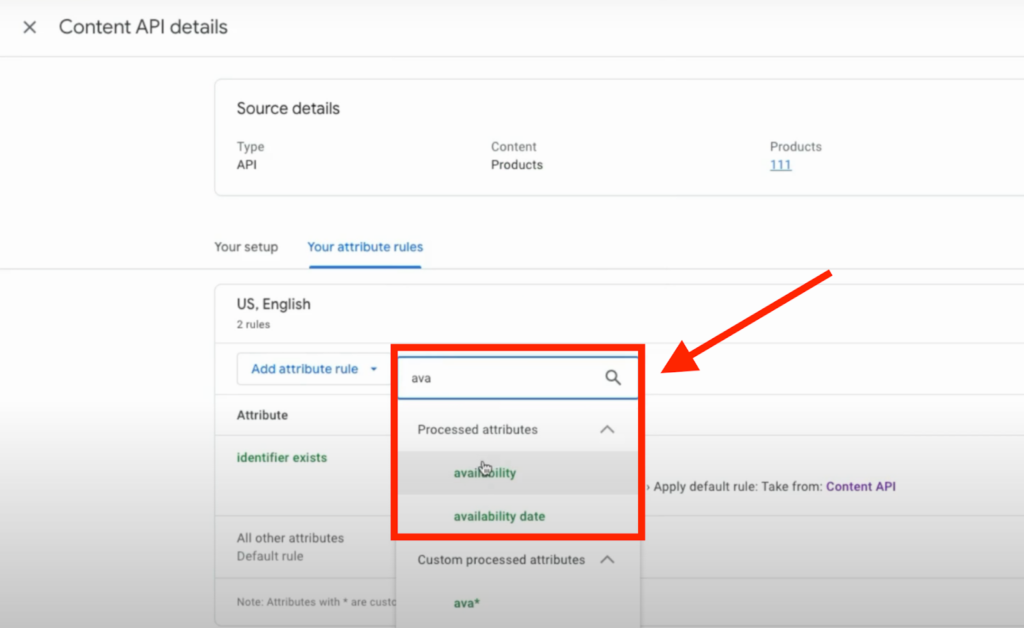
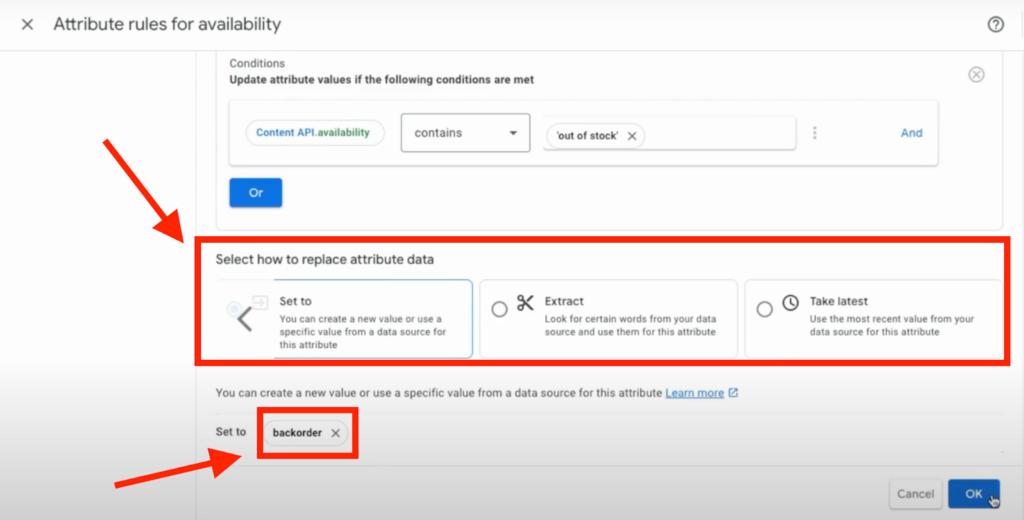
4. From the drop-down, select the “Availability” attribute.
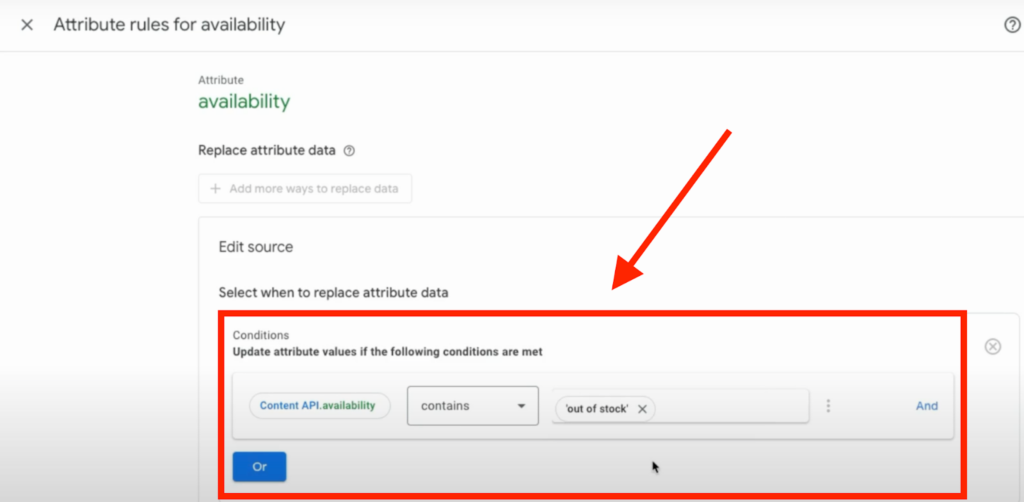
5. Set the condition to “Contains” and enter the value “Out of stock”. This will trigger the rule when a product is out of stock.
6. Set the replacement value to “Backorder”. This will update the availability of the product to “Backorder” when it’s out of stock.
7. Click “Save” to apply the changes. This will save the rule and apply it to your products.
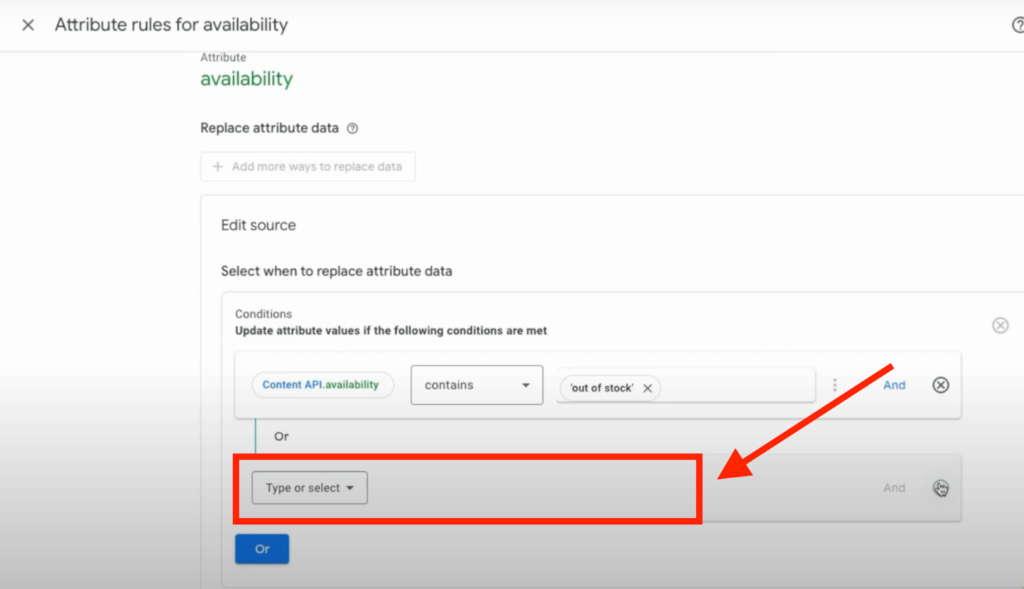
At this point, you can also add more conditions to the rule if needed. You can click on the “And” or “Or” button to add another condition. For example, you might want to add a condition to check for a specific product category or brand.
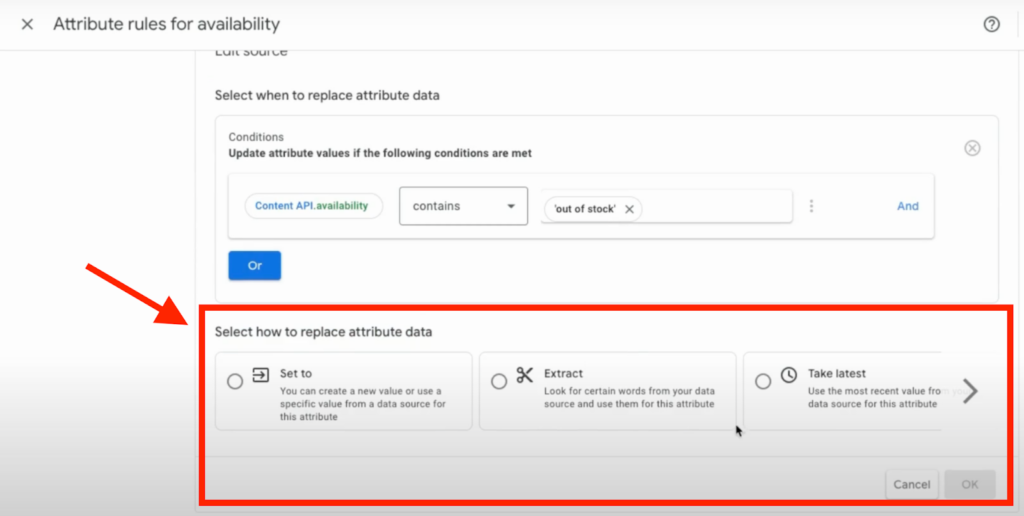
Next, you need to select how you want to replace the attribute data. You have three options:
Set to: This allows you to set a fixed value for the attribute.
Extract: This allows you to extract a value from a specific field or attribute.
Take the latest: This allows you to take the most recent value for the attribute.
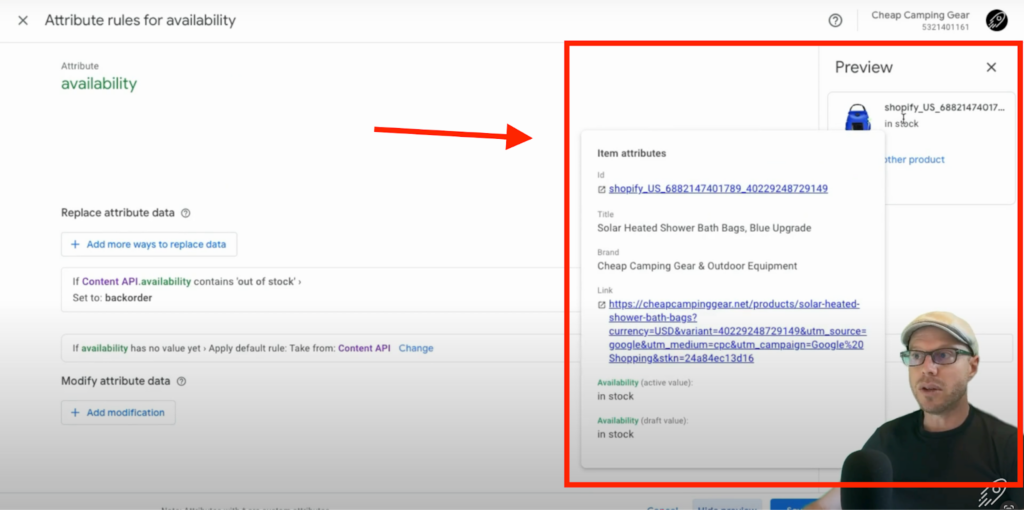
Once you’ve set up the rule, you can click “Okay” to save it. You can then preview the rule to see how it will affect your products. If you’re satisfied with the rule, you can save it as a draft.
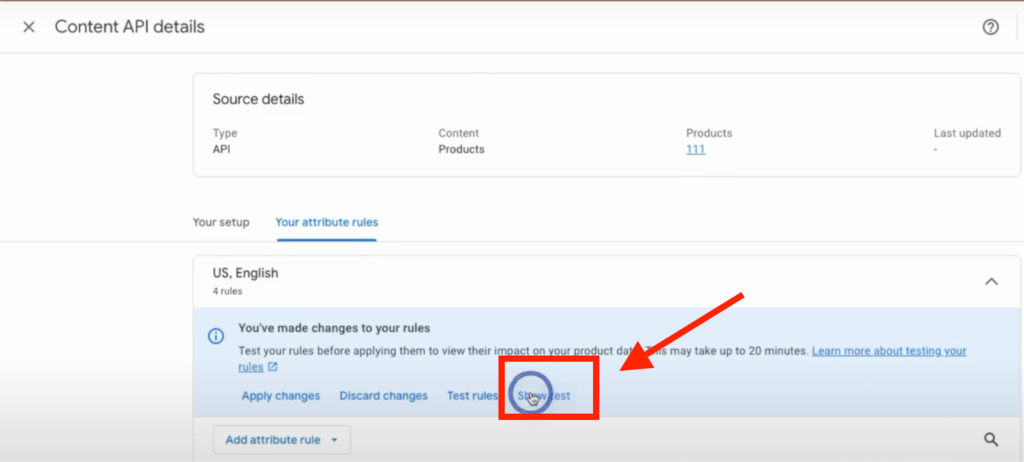
To test the rule, you can select a product and click “Show preview”. This will show you how the rule will affect the product’s availability. If you want to see how the rule will affect a different product, you can select a different product and click “Show another product”. This will update the preview to show the new product’s availability.
Understanding Availability Values
Before we proceed, let’s take a look at the different availability values you can use in Google Merchant Center:
In stock: This value indicates that the product is available for immediate shipping.
Out of stock: This value indicates that the product is currently unavailable.
Backorder: This value indicates that the product is available for pre-order, but it’s not currently in stock.
Preorder: This value indicates that the product is available for pre-order, but it’s not currently in stock.
Using the correct availability value ensures that your products are displayed correctly in Google Shopping and that customers have a positive experience.
Step 3: Add an Availability Date
When you set a product to “Backorder”, you’ll also need to add an availability date. This date indicates when the product will be available for shipping again. To add an availability date, follow these steps:
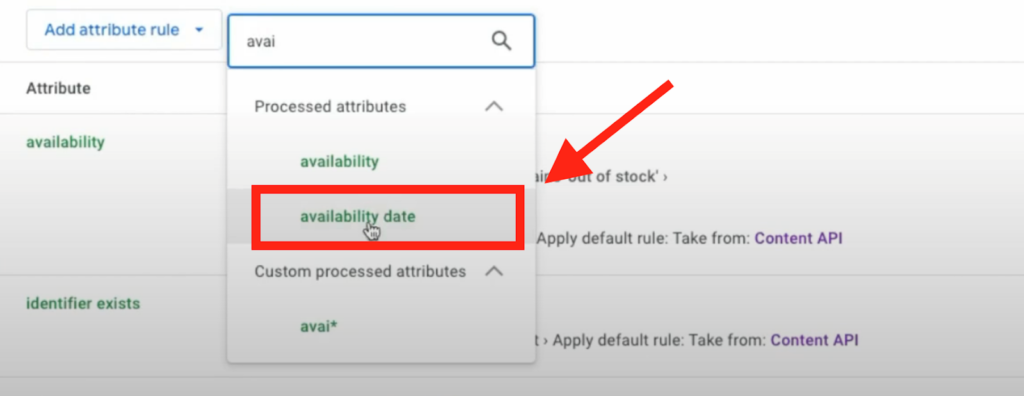
1. Go back to the “Attribute rules” tab and click the “Add rule” button. Now, select the “Availability date” attribute from the dropdown menu.
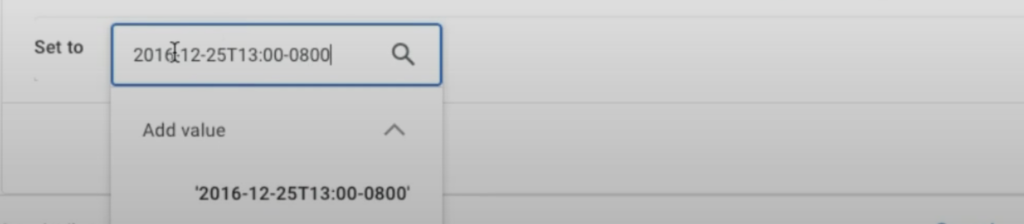
2. Set the condition to “Contains” and enter the value “Backorder”.
3. Set the replacement value to the desired availability date. Make sure to use the correct format, which is “YYYY-MM-DDTHH:MM:SS-08:00”.
4. Click “Save” to apply the changes.
Step 4: Test and Finalize Rules
Once you’ve set up the rules, you can test them to ensure they’re working correctly. Here’s how:
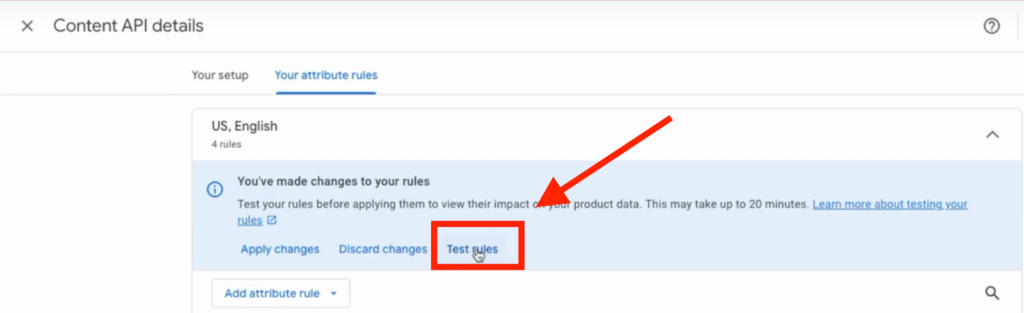
1. Go to the Google Merchant Center and navigate to the “Data sources” section. Click on the “Attribute rules” tab and select the rule you want to test. Then, click “Test rules” to run the test.
2. Wait for the test to complete (this may take up to 20 minutes, depending on the number of products in your store).
3. Finally, review the test results to ensure the rules are working correctly. This is what the screen should display.
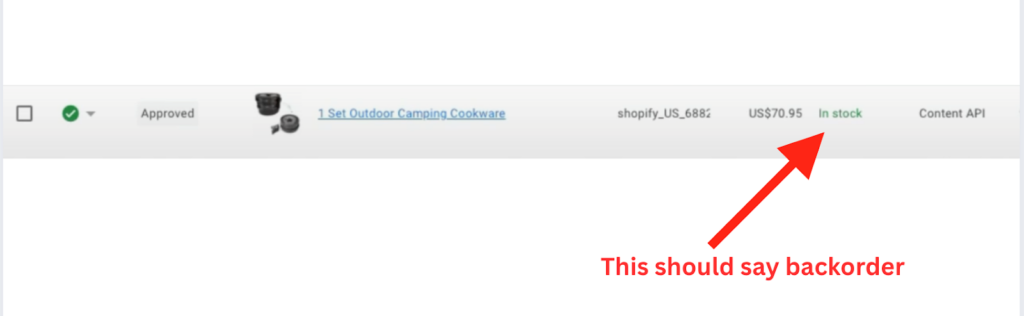
4. To double-check, go back to yourGoogle Merchant Center dashboard > Products, and in place of “In stock”, it should read “Backorder.” It may take a while to update.
And there you go! That’s how you can continue to advertise even when your products are out of stock.